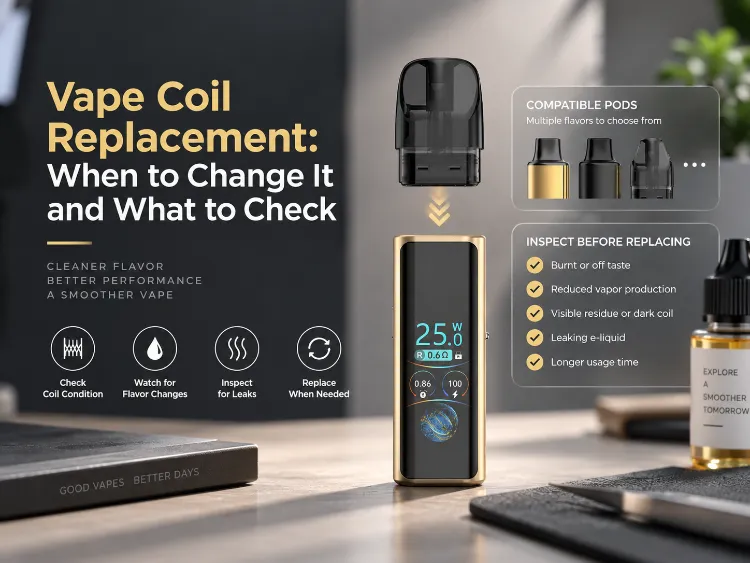
Vape coil replacement starts with compatibility. A replacement coil or pod can look similar to the old one and still use a different resistance, wick, airflow path or connector. Fitting the wrong part can leave the device weak, leaky or unable to deliver the expected flavor. The safer sequence is to confirm the exact device and replacement part, decide whether replacement is really needed, then install and prime the new coil according to the manufacturer’s instructions.
Wafoo presents disposable/pod-system devices and e-liquid products in its published range, and the exact model still owns its own specifications. Readers can use the published product range to identify the device family and the official product verification path when product identity matters. The same model-specific rule applies to coils: never transfer a resistance, pod shape or power range from one device to another.
Start With the Correct Coil or Pod
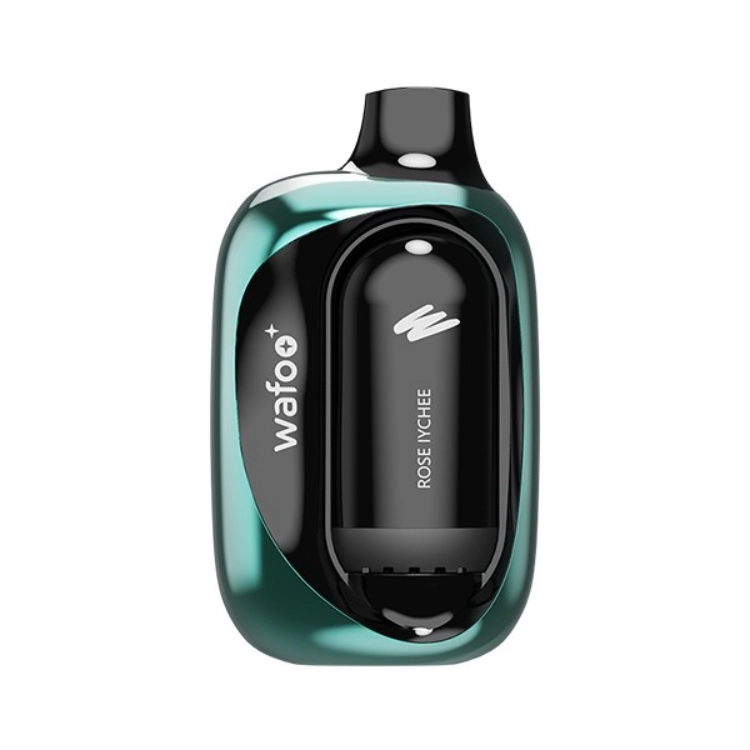
Compatibility is the first check. Find the device or pod name, the coil or pod family and the replacement part number if one is available. Verify the shape of the pod or tank, the way it seats, the contact points and the recommended operating range. A part that does not match those details should not be forced into the device.
The wicking body and heating wire are the two parts that shape how a replacement coil behaves. Wicking materials may include fiberglass rope, organic cotton rope or ceramic, and each differs in heat resistance, absorption speed and e-liquid capacity. Heating wire may use nickel-chromium alloy, stainless steel, pure nickel or ceramic designs, which differ in start-up speed, heat transfer and temperature control. The chosen part must match the device’s intended wick, heating element and airflow design; resistance alone does not prove compatibility.
The battery, atomizer and connection are part of one electrical path. Liquid atomization requires energy from the battery, and the materials used at the connection between the battery and the atomizer affect contact quality. A connection that becomes dirty, loose or worn can interrupt power, create weak vapor or stop the device from working even when the coil is new. Inspect the pod or tank contacts, the threads or magnetic connection and the airflow path during replacement.
The word “coil” can refer to different parts. Some devices use a replaceable coil inside a tank; others use a complete replacement pod with the coil built in. Confirm which part is actually replaceable. Replacing an entire pod when only the coil is serviceable, or trying to rebuild a sealed pod, can damage the product.
Keep the old part and its packaging during the search. The model name, resistance marking, pod shape or part number may be printed there. A photo of the old part beside the device can also help a supplier confirm compatibility. An unclear product listing should trigger a request for the exact device model rather than a choice by appearance.
Know When Replacement Is Needed
Flavor and vapor changes are the usual signals, but they are not the only ones. A coil can also need attention when the draw changes, the device gurgles or liquid appears around the pod connection. Start with the simple causes: low liquid, a loose pod, a blocked airflow opening or a charging or power issue. A persistent problem after those checks points to replacement.
A burnt taste is a strong signal, but it should not be the only one. Waiting for a severe burnt note can make the experience unpleasant and may leave residue that affects the new coil. Replace when performance has clearly changed and the device setup is otherwise correct.
Read the Flavor and Vapor Changes
Fading flavor, weaker vapor or a dry, harsh note can indicate that the wick is no longer supplying liquid efficiently. The change may appear gradually across several sessions or become obvious after a refill. Use the first few sessions after the last replacement as the comparison point. A consistent decline is more meaningful than one poor puff.
A single draw is not enough to judge the coil. A new refill, a different airflow setting or a cold device can change the first puff. Confirm the liquid level and seating, then take a few normal draws. A continuing weak or burnt pattern points to the coil or pod.
Check Leaks, Gurgling and Draw
Leaks and gurgling can come from overfilling, a loose pod, a blocked airflow path or a worn seal. Look at where the liquid appears. Liquid around the pod connection may point to a seal or fitting problem; liquid inside the mouthpiece may point to condensation or overfilling. Clean the connection and check the pod seating before replacing anything.
A tight or blocked draw can also change how the coil performs. Inspect the airflow opening and remove any visible obstruction according to the device instructions. A restricted draw after cleaning and reseating calls for replacement as directed for that model.
Replace the Coil Without Damaging the Device
Work with a clean surface and the device turned off. Remove the pod or tank according to the manufacturer’s instructions. Avoid pulling on wires, forcing threads or using tools that could scratch the contacts. A stuck old coil requires checking the removal direction before applying more force.
Keep the new coil in its packaging until the device is ready. This reduces the chance of dust or damage. If liquid is present around the connection, clean it with a dry, lint-free material and let the contact area dry before reassembly.
Prepare the New Coil
Match the new part against the old one. Confirm the model, resistance marking and pod shape. Look for bent contacts, damaged seals or a blocked wick opening. A visually different part should not be installed until compatibility is confirmed.
Some coils require a small amount of liquid on the wick openings before assembly. Others use a sealed pod that is ready to fill. Follow the instructions for the exact product. Do not over-prime a coil; excess liquid can flood the airflow path and cause gurgling.
Fit, Prime and Reassemble
Seat the coil or pod fully without forcing it. Reassemble the tank or pod, fill only to the recommended level and wait for the wick to absorb liquid if the instructions require it. Start at the device’s recommended power or setting. Start at the recommended setting when testing the new coil.
Take a few gentle draws and check the flavor, vapor and airflow. Gurgling after reassembly calls for a fill-level and connection check. If the taste remains burnt, stop and confirm that the coil is compatible and correctly primed. The new coil should be evaluated under normal operating conditions, not at an extreme setting.
Compare Replacement Cost and Availability
Replacement cost is more than the price of one coil. Compare the pack size, the number of coils or pods included, the expected replacement interval and the availability of the exact part. A low-priced coil can become expensive if it is difficult to find or does not last as long as the original.
Buy from a source that identifies the exact product and provides a clear part description. Generic listings that show only a photo or a broad device name may not be specific enough. For a pod system, confirm whether the manufacturer sells the pod or coil separately and whether the replacement has changed.
Cost also depends on how the device is used. Frequent dry hits, high power settings or thick liquids can shorten coil life. Compare the total replacement pattern rather than one purchase price. A compatible part that performs consistently is usually more useful than a cheaper part with an uncertain fit.
Confirm the Exact Product and Support
Before ordering, confirm the device model, the pod or coil family and the market version. Review the current product FAQ for the manufacturer’s guidance on samples, order quantities and custom support. Wafoo supports OEM/ODM work that can include custom design, functions and brand packaging, and samples can be requested with sample fees refundable upon a bulk order.
Product verification matters when the replacement part is sold through a distributor or marketplace. Confirm that the seller identifies the exact part and that the product matches the device. An unclear model name calls for the device name and a photo of the old coil or pod before purchase. A short verification step is faster than returning an incompatible part.
Conclusion
Vape coil replacement is a compatibility-first task. Before ordering, verify the exact device and replacement part, check the signs that the coil has reached the end of its performance, remove and fit the new part without forcing it, prime it as directed and compare the cost of the replacement over time. Do not choose a coil from appearance alone or start a new coil at an extreme setting. Share the exact device or pod model with Wafoo so the team can confirm the replacement path before the next purchase.
FAQs
Q1: How do I know when to replace a vape coil?
A1: Replace when flavor and vapor clearly decline, the draw becomes harsh or burnt, or the device gurgles or leaks after the simple causes have been checked. Check the liquid level, pod seating and airflow first.
Q2: Will any replacement coil fit my vape?
A2: No. The replacement must match the device or pod family, connector, shape and recommended operating range. Use the model name and the old part to confirm compatibility before ordering.
Q3: How much should a replacement coil cost?
A3: Cost depends on pack size, compatibility, availability and expected replacement interval. Evaluate the price per coil or pod and the cost over several replacements, not just the lowest one-time price.