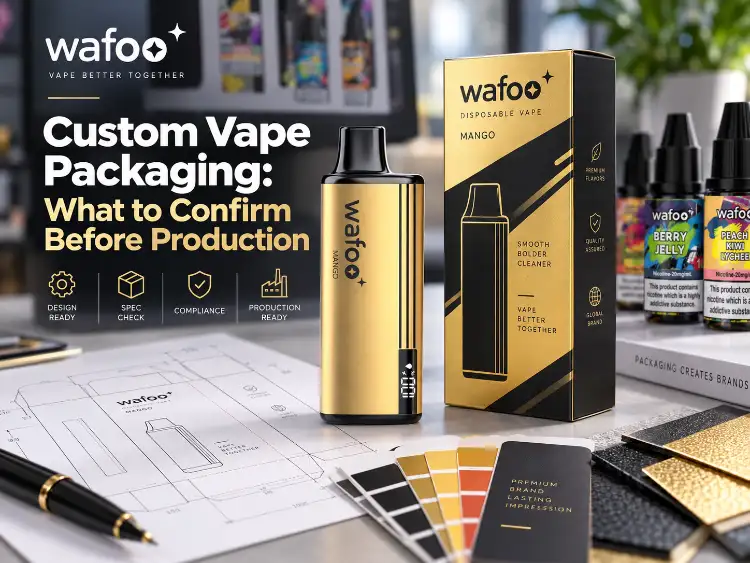
Custom vape packaging is easy to discuss as a design idea and much harder to approve as a production item. A box that looks convincing on a screen still has to hold the right device, survive handling, carry the correct label information and fit the order plan.
The first useful step is to separate the packaging task from the product task. A supplier can propose a shape, material and print treatment, but the buyer must first define what is going inside. The published product range includes disposable/pod-system devices and e-liquid products, so “vape packaging” cannot be treated as one physical specification. Buyers who confirm private-label manufacturing details early usually have fewer revisions later because the product brief is stable before the dieline is approved.
Start With the Product Format, Not the Box
A useful packaging brief begins with the exact product format. A disposable device, a refillable pod system and a pen-style device do not share the same proportions, closure requirements or display priorities. Providing the current technical drawing, a physical sample or a verified measurement set is more reliable than relying on a category description alone. When the device is still changing, the brief should say which dimensions are fixed and which are still provisional.
This is where projects lose time. A supplier may quote a generic box before the buyer has confirmed the device length, width, depth, mouthpiece profile or accessory count. The sample can look attractive while failing a basic fit check. Lock the product envelope first, then compare package formats. Buyers who need to understand how device shape affects use can compare the main vape shapes before deciding how much space to reserve for presentation.
For a disposable product, the packaging brief should also define whether the box carries one device, a multi-pack or a retail-ready display configuration. The count per pack changes the internal structure, the outer dimensions and the amount of protection required. This is why custom disposable vape packaging should be treated as a format-specific decision rather than a colour variation of a standard carton.
Pen-style devices create a different set of questions. A narrow body may need a sleeve, tray or shaped insert to stop movement inside the box, while the retail presentation may need enough visible surface to communicate the product without adding unnecessary material. Custom vape pen packaging should therefore be planned around the actual body profile and cap, not around a generic “pen box” assumption.
Build the Packaging Structure and Material Around the Device
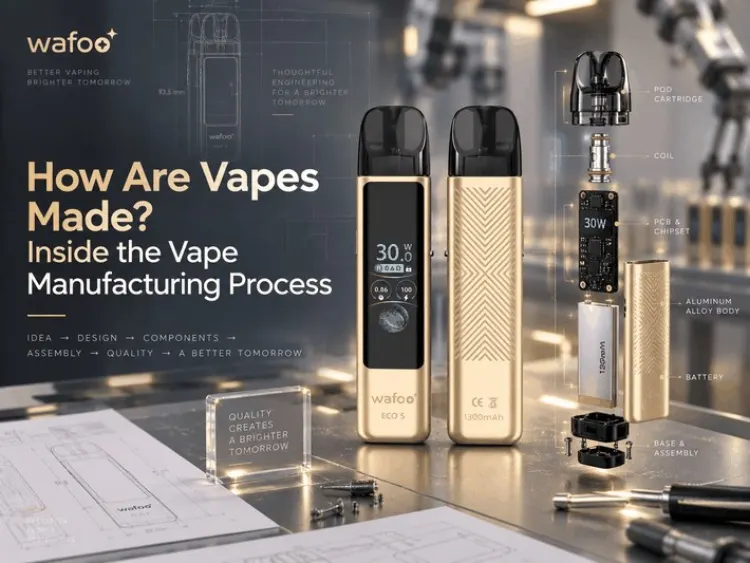
Once the product envelope is known, the package structure can be designed. A sourcing team does not need to specify every engineering detail, but the brief should identify the protection priority, the retail presentation and the handling route. A lightweight retail carton, a rigid presentation box and a protective shipping pack solve different problems. The package should be designed for the full journey, not only for the shelf.
Material and finish choices belong in the same discussion. Paperboard thickness, coating, print method, insert material and closure style all affect cost, durability and appearance. A premium finish can improve presentation, but it may also increase minimum quantities, production time or surface-damage risk.Choose a material that performs well enough for the product, market and distribution channel without avoidable cost.
Choose the Box Format and Insert
The box format should follow the product and the retail context. A sleeve and tray can be appropriate when the product needs a simple, lightweight package. A rigid box may suit a gift or premium presentation. A folded carton may be the better choice when the product needs efficient packing and a lower material footprint. The insert is equally important: it controls movement, protects the device and determines how the product sits when the package is opened.
Ask for a structural sample or detailed dieline before approving the format. It should show fold lines, glue areas, clearances and the relationship between the outer box and the insert. If the product is irregular or includes accessories, the insert may need a separate fit check. A box that works for one device format may not work for another.
Confirm Material and Protection Requirements
Material selection should be tied to the intended shipping channel. A product sold through local retail may spend less time in parcel handling than a product shipped by air or sea. The brief should state whether the product will travel as an individual parcel, a retail carton, a master case or a mixed shipment. That information helps the supplier choose a realistic protection level rather than overbuilding every package.
Buyers should also confirm what “protection” means for the product. The package may need to resist compression, vibration, moisture, abrasion or repeated handling. A distribution test such as an ISTA parcel-simulation protocol can help evaluate whether the package and product are likely to survive the intended route, but testing must match the actual weight, size and distribution method.
Prepare Artwork and Logo Placement for the Dieline
Artwork approval is a separate production gate. A logo can look correct in a flat file and still sit badly on a folded box. The designer should receive the current dieline, not an older template, so every panel, flap, fold and glue area is visible. Confirm which surface is the front panel, where the logo appears, which information must remain unobstructed and how the design behaves when the box is opened.
Logo placement on custom vape boxes should be checked for more than position. Colour build, print method, minimum line width, background coverage and finish all affect the final result. A metallic or textured finish may require a different production route from a standard coated board. Check the colour reference and ask how production variation will be controlled.
Before artwork is released, verify that the file matches the approved dieline and that every version is labelled. Old artwork, missing fonts and unlinked images are common delays. The final proof should show the artwork on the actual structure, with fold lines and panel boundaries visible. That proof is what the buyer approves, not a separate flat image that may not represent the finished package.
Validate a Physical Sample Before Production
A physical sample is the point where the packaging brief becomes testable. A physical sample lets the buyer hold the package, open it, close it, place the product inside and check how the complete unit presents. This step should happen before tooling or mass production is approved. Digital proofs are useful for artwork review, but they cannot prove fit, assembly or protection.
Samples can be requested, and sample fees are refundable upon a bulk order, which gives buyers a practical way to evaluate a packaging direction before committing to a larger run. The sample should represent the intended structure, material and print route as closely as possible. If a material is unavailable for sampling, the supplier should explain the substitution and the risk it creates for the production version.
Run a Physical Fit and Assembly Check
The fit check should confirm that the product enters the package without forcing, sits securely, closes correctly and can be removed without damaging the box. The insert should hold the product in the intended position. Any accessory, instruction card or label should be placed in the sample, because additional items can change the internal clearance.
Record what passed and what changed. If the sample needs a larger clearance, a different insert or a stronger closure, those changes should be made before artwork is finalised. A written approval record with photos and measurements reduces the chance that production uses an outdated version.
Test the Package for the Intended Shipping Channel
Packaging should also be evaluated for the way it will travel. A retail carton that moves directly from a local warehouse to a store may not need the same protection as a product shipped through parcel networks or consolidated freight. Define the distribution route and ask whether a relevant transport simulation is appropriate.
If testing is used, the sample should represent the production package, including the correct material, closure and insert. Review the test conditions and the product’s condition afterward, not only the pass/fail label. A result can reveal a weak corner, loose insert or print area that scuffs in handling. Fix those findings before mass production.
Verify Market-Specific Label Requirements
Packaging artwork cannot be approved without checking the destination market. In the United States, the FDA regulates the packaging and labeling of electronic nicotine delivery systems as part of its broader tobacco-product oversight. The exact label content, warning statements and placement can depend on the product, market and current rules. That makes label verification a buyer responsibility, even when a supplier provides a draft layout.
Confirm the required text with the appropriate regulatory or compliance owner before the dieline is locked. The review should cover the front and back panels, the information panel, any insert or leaflet and the master case if it also carries regulated information. The supplier can prepare the artwork, but it should not be treated as the final authority on market access. When a buyer sells in more than one market, the brief should state which version belongs to which destination.
Label planning also affects structure. A warning statement may require a minimum panel size, specific contrast or a position that cannot be covered by a sticker or finish. If label requirements surface after the box is designed, the buyer may need a new dieline or a second print version. Checking the label brief before artwork approval is faster than correcting a finished package.
Translate the Approved Brief Into Quantity and Lead Time
Commercial planning should align with the production process behind the device or e-liquid. A vape manufacturing workflow covers material selection, material handling, component assembly, product testing and final mass production, with quality control at each stage. An OEM/ODM model can also provide large-scale production capabilities, centralized raw material procurement and established quality-control and delivery processes, which may shorten product launch cycles when the packaging brief matches the production schedule and supply-chain assumptions. For regular products, the MOQ is 500 units; custom orders require a sales discussion. Buyers should also align e-liquid production and flavour decisions with the final product format.
In-stock items ship within 3–5 days, while custom orders take 15–25 days, but those windows are general. Verify the schedule for the exact product, packaging specification and destination before committing to a launch date. A realistic production plan includes artwork approval, sample production, quality control, product testing, final inspection and shipping. Each stage should be tied to a clear approval and delivery dependency so the schedule reflects the actual manufacturing process rather than an optimistic estimate.
E-liquid production involves raw materials, high-purity propylene glycol, vegetable glycerin, nicotine solution and food-grade flavourings, followed by mixing and a standing period before filling. Packaging planning should match those process steps because fill volume, liquid format and label information must agree with the final product. A finish, insert or structural feature that works at one quantity may also be uneconomical at another, so compare the target volume with the print setup and expected reorder plan.
Conclusion
A packaging project becomes manageable when the buyer confirms the product envelope, structural fit, material and protection needs, artwork and logo placement, physical sample, market-label requirements and order plan in sequence. Do not approve a dieline before the product dimensions are stable, and do not approve mass production before a physical sample has been checked against the intended product and shipping route. Use the approved sample, label review and quantity plan as the release package for production. Share the device format, packaging direction, target quantity and destination market with Wafoo so the team can confirm the packaging brief before the next production step.
FAQs
Q1: What should be confirmed before placing a custom packaging order?
A1: Confirm the exact product format and dimensions, box structure and insert, material and protection level, artwork and logo placement, a physical sample, the label requirements for the destination market, the target quantity and the expected lead time. Also identify which decisions are fixed and which can still change.
Q2: How do disposable and pen-style devices change the packaging brief?
A2: Disposable devices may require a different count per pack, display format and protection level, while pen-style devices may need a shaped insert or retention feature because of their narrow body. The packaging should be designed around the exact product dimensions rather than a generic device category.
Q3: Why does a physical sample matter before mass production?
A3: A physical sample shows whether the product fits, whether the insert holds it correctly, whether the box closes and opens as intended and whether the package is likely to survive the planned shipping route. It also gives the buyer a concrete version to approve before tooling and production begin.